
How to Matt 19th-Century Paper Prints Safely
Quick Summary
Archival matting means framing a 19th-century paper print with materials that will not damage it, such as 100% cotton rag or alpha-cellulose board that is buffered and lignin-free. Hinge the print with Japanese tissue and wheat-starch paste, never with adhesive tape. Assess condition first, because matting a print in active deterioration only frames the problem.
- Use 100% cotton rag or alpha-cellulose board, which is buffered and lignin-free.
- Standard wood-pulp board is unsuitable for antique prints, even when sold as acid-free.
- Check for active deterioration first; flaking ink or spreading mould means refer to a conservator.
- Hinge with Japanese tissue and wheat-starch paste, using two hinges for prints up to roughly A3.
- Never use pressure-sensitive tape or dry mounting, since both cause irreversible damage.
Table of Contents
- Why Archival Matting Matters for 19th-Century Prints
- Assess Condition Before You Matt: When Not to Mat
- Choosing Acid-Free Mat Board for Artwork
- Hinge Mounting Paper Prints Without Adhesive Damage
- Spacers for Framed Prints and Preventing Glazing Contact
- Step-by-Step Matting Workflow for Antique Prints
- Dry Mounting Antique Prints: Why Most Experts Advise Against It
- Your Next Step: Matting Your First 19th-Century Print
- Frequently Asked Questions
Archival matting is the single most important decision you make when framing a 19th-century paper print. Get it right and the print can survive another century; get it wrong and acidic materials can stain, yellow and weaken the paper within years.
These prints are often fragile. Paper made in the 1800s was frequently wood-pulp based, and wood pulp contains lignin, which breaks down over time and releases acids that migrate into the sheet, causing browning, brittleness and foxing.
Why Archival Matting Matters for 19th-Century Prints
Archival matting means framing a print with materials that will not damage it over time: nothing touching the print should harm it, and the print should be easy to remove without leaving marks.
Three things do most of the damage to antique prints:
- Acidic board or paper that releases acid into the sheet
- Adhesives that stain, dry out or pull fibres when removed
- Light and moisture, which speed up fading and staining
Cotton rag board, usually sold as 100% cotton rag or alpha-cellulose board, is the usual choice for conservation work.
Watch out: A mat labelled "acid-free" is not always archival.
Assess Condition Before You Matt: When Not to Mat
Most guides to archival matting assume the print is sound. For 19th-century paper, that assumption is often wrong. A sheet that looks fine at arm's length can be actively deteriorating, and matting it can accelerate the damage by trapping acids, moisture or flaking pigment against the paper. Before cutting a single board, spend ten minutes assessing the print under raking light and at magnification.
Distinguish stable from active deterioration
The key question is not whether damage exists, but whether it is still progressing. Stable damage can usually be matted safely. Active damage should be stabilised by a paper conservator first.
| Condition | Stable signs | Active signs, do not mat yet |
|---|---|---|
| Foxing | Small, scattered, dry spots that have not changed in years | Spreading patches, damp feel, dark centres with pale halos |
| Tears | Old, flat, no lifting | Fresh, curled edges, fibres standing up |
| Flaking ink | None | Loose pigment that transfers to a gloved finger or blotter |
| Mould | Old, dry, inactive staining | Musty smell, powdery surface, soft or stained paper |
| Brittleness | Edges intact, paper flexes | Cracks along folds, corners snapping off |
A simple field test: place a clean sheet of acid-free blotter over the print and weight it lightly for a few minutes. Any transfer of colour, powder or tackiness indicates active deterioration.
Conditions that change the matting approach
Some conditions do not rule out matting but require a modified method:
- Cockled or undulating paper. The print will not sit flat against the backing. Use a deeper mat window and slightly larger hinges so the paper can move, rather than flattening it under pressure.
- Deckle edges or untrimmed margins. These are part of the print's historic character. Size the mat window to reveal them, and never trim to fit a standard frame.
- Hand colouring. Water-based colour can lift with any moisture, including starch paste. Use dry hinges or consult a conservator before applying any paste near coloured areas.
When to stop and refer
Refer the print to a paper conservator if you see any of the following:
- Active flaking or powdering of ink or pigment
- Mould that is still soft, smelly or spreading
- Tears longer than about 2 cm, or losses within the image area
A conservator can consolidate flaking media, wash and deacidify the sheet, repair tears with Japanese tissue and wheat-starch paste, and return a stabilised print for matting. Matting a print in active deterioration does not preserve it, it simply frames the problem.
Choosing Acid-Free Mat Board for Artwork
When you shop for acid-free mat board for artwork, look for three things on the label: 100% cotton rag or alpha-cellulose content, a buffered core, and a pH-neutral or alkaline rating. Standard wood-pulp board with a white surface is not suitable, even if sold as acid-free.
Here is a quick guide to the main options:
| Board type | Core material | Buffered | Best use |
|---|---|---|---|
| 100% cotton rag | Cotton fibre | Usually yes | Valuable or fragile prints |
| Alpha-cellulose | Purified wood cellulose | Usually yes | General archival framing |
| Wood-pulp (acid-free) | Wood pulp, treated | Sometimes | Short-term or low-value work |
| Standard wood-pulp | Wood pulp | No | Avoid for antique prints |
Hinge Mounting Paper Prints Without Adhesive Damage
Hinge mounting is the standard conservation method for paper prints because it holds the sheet securely while allowing it to expand, contract and be removed without damage. The principle is simple: attach the print at a few small points along its top edge, using a weak, reversible adhesive on a thin, strong carrier. The execution is where most damage happens.
The two-part hinge
A conservation hinge has two parts:
Seashells, Brown Captain Thomas, Bivalve Shells, Plate XLIX, 1827 →
- The hinge itself, a strip of Japanese tissue, usually 1.5 to 2.5 cm wide and 3 to 5 cm long, pasted to the back of the print along its top edge and folded over to attach to the backing board.
- The counter-hinge or guard, a second strip that bridges the fold and attaches to the backing board, spreading the load and preventing the hinge from peeling away.
Japanese tissue is thin, strong when wet, and tears predictably if the print is pulled, a mechanical fuse that fails before the artwork does. Wheat-starch paste is preferred because it is reversible with water, does not stain, and stays flexible as it ages.
Sizing and placing hinges
- Number of hinges. Use two hinges for prints up to roughly A3 size. Add a third central hinge for larger or heavier sheets, or for paper that is cockled.
- Position. Place hinges about one-fifth of the sheet width in from each side edge, not at the very corners. Corner hinges concentrate stress and can tear the paper.
- Length. The hinge should be long enough to fold over the top edge of the backing board and adhere by at least 1.5 cm on the reverse.
Step-by-step hinge mounting
- Prepare the paste. Mix wheat-starch paste to a consistency like thin cream. Let it cool before use.
- Tear the hinges. Tear Japanese tissue strips to size, feathering one long edge.
- Apply paste sparingly. Brush a thin film of paste onto the feathered edge of the hinge. Excess paste causes cockling and staining.
- Attach to the print. Place the pasted edge on the back of the print along the top edge, press gently with a blotter, and leave to dry under light weight.
- Attach to the backing. Fold the hinge over the top edge of the backing board and paste the free end to the reverse. Add a counter-hinge if the sheet is heavy.
- Dry flat. Leave the mounted print under a clean blotter and light weight for several hours before adding the window mat.
Why pressure-sensitive tapes fail
Masking tape, sellotape, double-sided tape and gummed paper tapes share the same failure mode: the adhesive migrates into the paper, oxidises and becomes insoluble. The carrier then falls off or, worse, bonds permanently to the sheet, and removal takes surface fibres with it, leaving an irreversible stain. Heat-set and solvent-set tapes are equally unsuitable. No pressure-sensitive tape is appropriate for direct contact with an antique print.
Mat-window sizing and preventing contact
The mat window should overlap the print by 3 to 5 mm on each side, enough to hold the sheet visually without covering the image or plate mark. For prints with plate marks, size the window just outside the plate mark so the intaglio edge remains visible. The window must never press on the print; the hinges carry the weight.
Spacers for Framed Prints and Preventing Glazing Contact
A print must never touch the glass, which can cause mould, condensation staining and acid transfer from the glazing. Spacers hold the glass a small distance away from the print.
Spacers can be made from archival board strips or bought ready-made in the same board type as your mat.
Pair spacers with UV-filtering glazing to reduce fading from daylight over the long term.
Step-by-Step Matting Workflow for Antique Prints
Work on a clean, flat surface with good light. Wash your hands and wear cotton gloves when handling the paper.
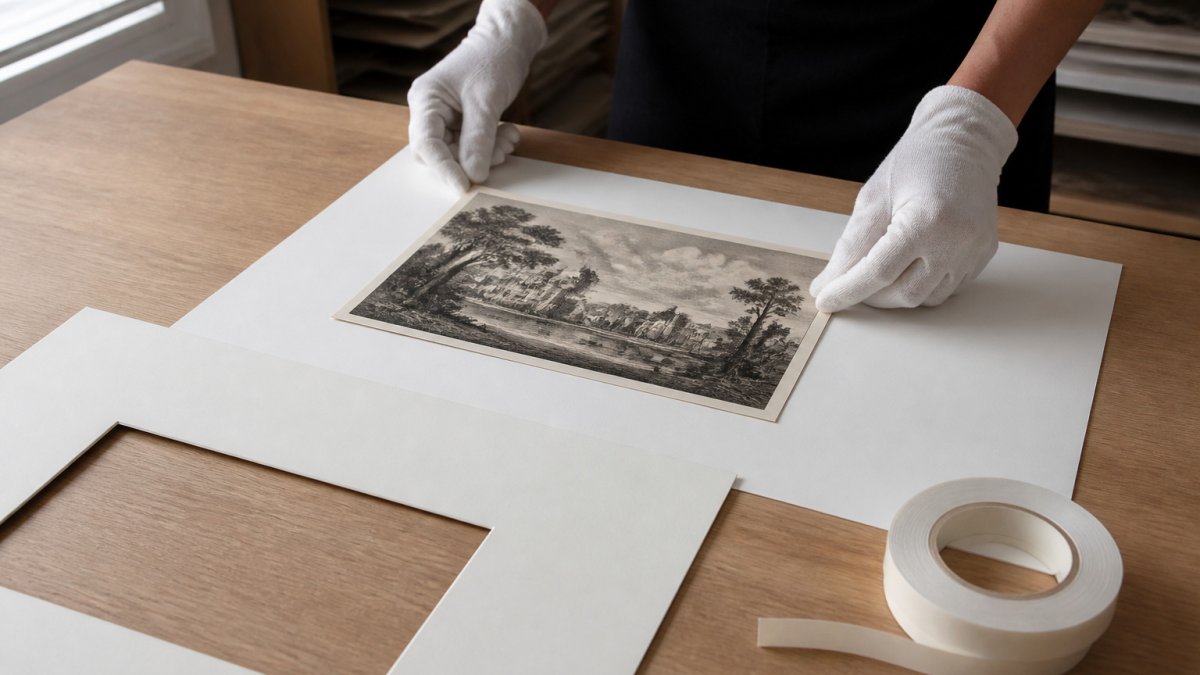
- Check the condition. Confirm the print is stable and suitable for matting.
- Measure the print. Note the exact size of the sheet, including any margins.
- Cut the mat board. Cut the window mat so the opening shows the image without covering any of it. Leave a margin of about 2 to 3 cm on each side.
- Prepare the backing. Cut a backing board the same size as the mat.
- Hinge the print. Attach the print to the backing with Japanese tissue hinges.
- Add the spacers. Place spacers around the edge to keep the glass clear.
- Assemble the frame. Lay the glazing, spacers, mat, print and backing in the frame in that order, then seal the back with acid-free paper.
Take your time. Most damage happens when people rush the hinging or handle the print without gloves.
![Pair of clean hands in cotton gloves lining an antique engraving face-up on a white conservation board, with a folded mat window and a roll of cotton tape on a clean wooden work surface in soft daylight | section:Step-by-Step Matting Workflow for Antique Prints]
Dry Mounting Antique Prints: Why Most Experts Advise Against It
Dry mounting uses heat and an adhesive-coated tissue to bond a print to a board. It is fast and common in print shops, but almost never suitable for antique prints: the heat can distort the paper, and the bond is permanent.
Many conservators consider dry mounting irreversible and unsafe for valuable paper. If a print has already been dry mounted, do not attempt removal yourself, take it to a paper conservator.
Your Next Step: Matting Your First 19th-Century Print
Start with a print you are comfortable working with, ideally one in good condition and not especially rare. Practise the hinging technique on a scrap sheet first, then apply the steps to the prints you care about most.
If you are looking for a print, browse our curated selection of over 1,200 authentic original antique prints and high-quality reproductions, including botanical prints, and choose one that suits your space. If you would rather let someone else choose, a gift card for the antiquarian print shop lets them pick their own piece.
Frequently Asked Questions
What materials are safe for matting antique paper prints?
Use 100% cotton rag or alpha-cellulose mat board that is labelled acid-free and lignin-free, with a neutral or buffered core. Pair it with cotton tape and Japanese tissue hinges, and avoid pressure-sensitive tapes, PVA glue, and standard wood-pulp board, which releases acids that discolour paper over time. Check the supplier's specification sheet rather than relying on the word archival alone.
Should a 19th-century print touch the glazing?
No. The print should sit at least a few millimetres away from the glass, held by spacers or a window mat that keeps the surface clear. Contact can trap moisture, transfer ink or pigment, and cause mould or sticking on hand-coloured areas. Use a spacer strip or a deeper mat window to create that gap, and fit UV-filtering glazing where the print will be displayed near light.
How do you attach an antique print to a mat without damaging it?
Use reversible hinges made from Japanese tissue and wheat starch paste or a conservation-grade adhesive, attached only to the verso of the sheet's upper edge. Never tape the print directly, and never let adhesive reach the image. Hinges let the print be lifted out later without residue, which is the main reason conservators prefer them over permanent mounting.
What is the difference between acid-free and archival mat board?
Acid-free means the board has a neutral pH at the time of manufacture, usually measured on the surface. Archival is a broader term that is not regulated, so it can be used loosely. Look for boards that are lignin-free, made from cotton rag or alpha-cellulose, and buffered if you want protection against future acid migration from the surrounding environment.
Should an old print be dry-mounted?
In most cases, no. Dry mounting uses heat and adhesive to bond the print to a backing, which is generally irreversible and can cause the paper to cockle, discolour, or lose its original surface. Reversible hinge mounting or a window mat is the standard approach for antique prints, and dry mounting is usually reserved for prints that are already in poor condition and need support.