
7 Steps to Create an Antique Print Gallery Wall
Last Updated: October 24, 2026
Quick Summary
To create an antique print gallery wall, measure your wall space, select a visual theme to tie pieces together, source authentic antique prints with proper provenance, gather frames with conservation-grade materials, plan your layout on kraft paper templates, mark precise spacing of 5-10 centimetres between frames, and hang with appropriate hardware rated for frame weight.
- Position the centre of your gallery wall at eye level, roughly 150-160 centimetres from the floor.
- Use acid-free mats, Japanese paper hinges, UV-protective glazing, and spacers to protect antique paper from damage.
- Common visual themes include botanical, natural history, architecture, fashion, or eclectic mixes tied by colour or frame finish.
- Distribute visual weight evenly across the composition, placing the heaviest or most important piece slightly off-centre.
- Use a spirit level on every frame and photograph the finished wall with fixing positions for future reference.
Table of Contents
- Step 1: Measure Your Wall and Choose Your Display Area
- Step 2: Select a Visual Theme and Cohesive Direction
- Step 3: Source Authentic Antique Prints and Artwork
- Step 4: Gather Frames and Explore Antique Print Framing Ideas
- Step 5: Plan Your Gallery Wall Layout Template
- Step 6: Apply a Gallery Wall Spacing Guide and Arrange on the Floor
- Step 7: How to Hang a Gallery Wall with Precision
- Protecting Your Antique Prints After Installation
- Frequently Asked Questions
Step 1: Measure Your Wall and Choose Your Display Area
Measure the width and height of your wall space in centimetres and mark the studs with a pencil, you'll need them for hanging hardware.
Sunlight fades prints, so avoid placing your gallery wall directly opposite windows. If your wall gets afternoon sun, use UV-protective glass when framing.
Most people view art at eye level, roughly 150-160 centimetres from the floor, so position the centre of your gallery wall at this height.
Step 2: Select a Visual Theme and Cohesive Direction
A visual theme gives your antique print gallery wall direction and ties pieces together, even if they vary in size or style.
Common themes include:
- Botanical: Plants, flowers, herbs, works well with natural wood frames
- Natural history: Birds, insects, shells, pairs beautifully with vintage brass or dark wood
- Architecture: Historic buildings, structures, suits ornate or minimalist frames equally
See antique bird prints for wall art organized by subject matter to explore how specific themes work together in a gallery wall.
Your pieces don't all need to match, but they should speak to each other through colour, era, or subject matter.
Browse antique print shops for collectors to see what speaks to you, and let instinct guide your theme rather than forcing a concept.
Step 3: Source Authentic Antique Prints and Artwork
Authentic antique prints carry specific markers: age-appropriate paper texture, period-correct printing techniques, and visible wear consistent with their era.
Look for these indicators of authenticity:
- Paper quality: Antique paper feels different, it's often thicker, slightly yellowed, and may show foxing (brown spots from age)
- Printing technique: Hand-coloured copperplate engravings show individual brushstrokes. Lithographs have a distinct surface quality. Woodcuts display characteristic line patterns
- Provenance: Reputable sellers document a print's history and source
Decide between originals, which appreciate in value and carry historical weight, and reproductions, which cost less and display well without investment concerns.
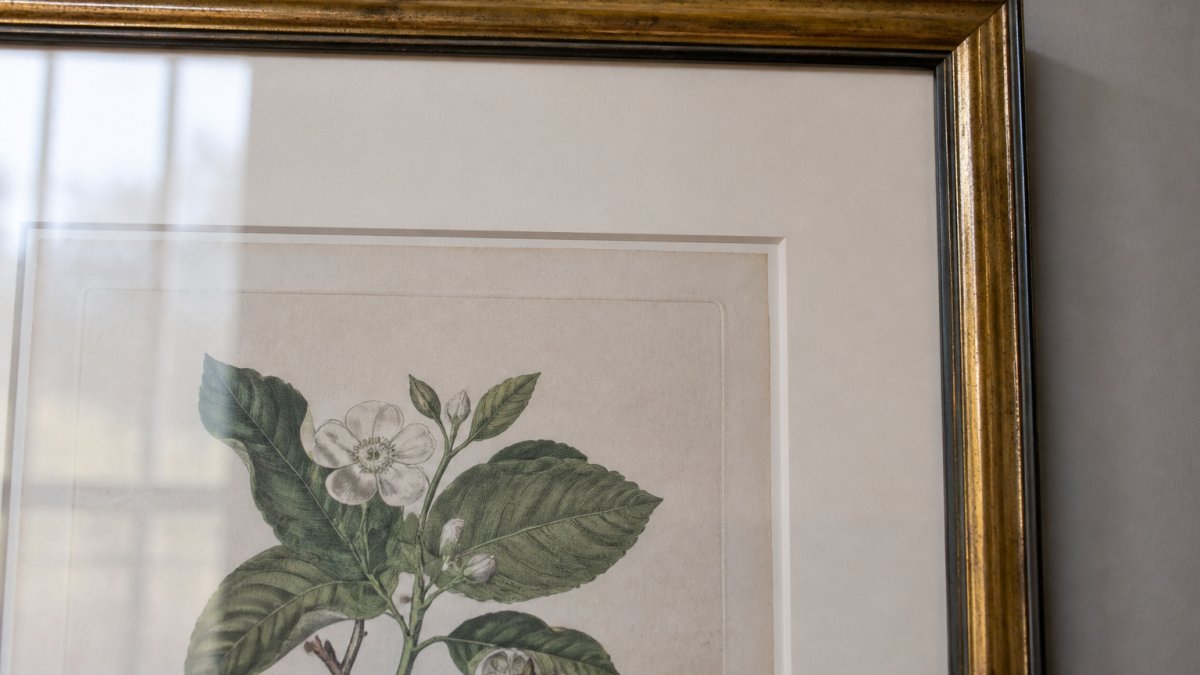
Consider the artist and subject. A George Shaw ostrich engraving from 1808, like the Bird, Shaw George, Ostrich c 1808, offers both artistic merit and natural history significance.

For sourcing, browse authentic antique prints from established dealers who verify condition, technique, and provenance. Poor sourcing ruins the entire project.
Step 4: Gather Frames and Explore Antique Print Framing Ideas
Frames protect your prints, control visual weight, and tie pieces together. For antique prints, the frame is also a conservation decision.
Mixed frames create visual interest but need cohesion: mix colours (gold, silver, wood) while keeping width consistent, or vary widths while sticking to one finish.
Frame options for antique prints:
- Vintage wood frames: Deep gold, walnut, or black, classic and warm
- Antique brass or gold: Formal and elegant, suits natural history subjects
- Simple black frames: Modern, lets the print dominate
Frame for the paper, not just the room
Antique paper is acidic and brittle, and the wrong framing materials will accelerate its decline. Build every frame around four conservation layers:
- Acid-free or museum-grade mat and backing board. Standard cardboard and foam-core leach acid into the print and cause brown burn lines over time. Specify buffered, lignin-free board.
- Hinges, not tape. Prints should be attached with Japanese paper hinges and wheat-starch or methylcellulose paste, or held in a photo corner, so they can be removed without damage. Pressure-sensitive tapes, masking tape and dry-mounting are irreversible and reduce value.
- UV-protective glazing. Conservation-grade glass or acrylic filters most ultraviolet light. Acrylic is lighter and safer for large frames; glass resists scratching better. Anti-reflective coatings reduce glare without changing colour.
- A spacer or mat gap. The print should never touch the glazing. Condensation and mould form where paper meets glass, so keep a mat border or frame spacer between them.
If a print is genuinely rare or valuable, ask a conservator before framing; a framer who specialises in works on paper will use the right materials.
When to custom-frame and when not to
Custom framing is worth the cost for original antique prints you intend to keep long term, because the frame is part of the object's protection.
A mat creates breathing room between the print and glass. Choose colours that complement your print, cream for warm tones, white for cool ones, or a shade pulled from the print itself, and keep the border wide enough (a common range is 5-8 centimetres) to keep the print clear of the glazing.
Step 5: Plan Your Gallery Wall Layout Template
Before you hang anything, create a layout template on the floor to experiment without damage.
Bird, Shaw George, Ostrich c 1808 →
Adjust until the layout feels right, then photograph the final template to reference when marking your wall.
Step 6: Apply a Gallery Wall Spacing Guide and Arrange on the Floor
Spacing separates a cluttered wall from a composed one. Most professionals start with 5-10 centimetres between frames, varying by frame size and room scale.
For a gallery wall spacing guide, measure the gaps between your kraft paper templates. Mark these distances in your photo.
Common spacing patterns:
- Uniform grid: Equal space between all frames, formal and structured
- Salon style: Varied spacing with a cohesive feel, requires careful eye
- Clustered: Small gaps between some frames, larger gaps between clusters, modern and dynamic
Once your floor layout is final, mark the top-left corner of your first frame on the wall, then measure horizontally and vertically to mark the remaining frames.
Step 7: How to Hang a Gallery Wall with Precision
Precision here prevents damage and keeps your gallery wall level for years. Antique frames are heavier and more fragile than modern ones, so hardware and measurements matter more than for a poster wall.
Choose hardware by weight and wall type
Match the fixing to the frame's weight and the wall's construction:
- Plasterboard (drywall): Use hollow-wall anchors or toggle bolts rated well above the frame weight. A single picture hook is fine for light frames, but heavy antique frames need two fixings.
- Masonry and brick: Use masonry plugs and screws. Avoid hammering pins into brick, they loosen and crack the surface.
- Timber studs: Screw directly into the stud wherever a fixing lands on one. Studs are the most secure option for heavy pieces.
As a rule of thumb, choose hardware rated for at least twice the weight of the framed piece. For very heavy or oversized antique frames, use two hooks set apart rather than one central hook, and run a taut picture wire between them so the frame cannot swing.
Set the centre height before you drill
Hang so the centre of the composition sits at eye level, roughly 150-160 centimetres from the floor. Mark that height lightly in pencil and work outward from the centre rather than a corner, keeping visual weight where viewers actually look.
A print-aware layout formula for mixed sizes
Antique print collections rarely arrive in matching sizes. Maps, botanical plates, portraits and natural-history plates all have different proportions, so use a repeatable method rather than eyeballing it:
- Sort by visual weight, not just size. A dark, densely detailed engraving carries more weight than a pale, airy plate of the same dimensions. Distribute the heaviest pieces across the composition, not all on one side.
- Anchor with the largest piece. Place the biggest or most important print slightly off-centre, then build around it.
- Keep orientation in mind. Group portrait-format plates in columns and landscape-format plates in rows where possible; mixing them freely works only when spacing is generous.
- Hold spacing consistent. A common starting range is 5-10 centimetres between frames, with wider gaps (10-15 centimetres) between clusters. Consistency reads as intentional; uneven gaps read as accidental.
- Check the outer edge. The outer boundary of the arrangement should form a rough rectangle or deliberate shape, not a ragged outline.
Hang in sequence
Follow these steps:
- Install the fixings at your marked positions, starting with the anchor piece.
- Hang your heaviest piece first, usually the large central frame.
- Hang pieces radiating outward from the centre.
- Use a spirit level on every frame and check the gaps between frames as you go.
- Step back every few frames to assess balance from viewing distance.
- Adjust hook positions slightly if needed; small corrections prevent a lopsided result.
For valuable or oversized prints, consider professional installation. Some framers offer gallery-wall hanging services and guarantee precision, which is often cheaper than repairing a damaged antique frame.
Choose the right hardware based on your wall type and frame weight to ensure secure, long-lasting installation.
| Wall Type | Hardware | Best For |
|---|---|---|
| Plasterboard (drywall) | Hollow-wall anchors or toggle bolts | Light to medium frames |
| Plasterboard (drywall) | Two fixings | Heavy antique frames |
| Masonry and brick | Masonry plugs and screws | Solid wall installation |
| Timber studs | Screws direct into stud | Most secure option for heavy pieces |
| Picture rails | Rated picture-rail hooks | Adjustable hanging with cord or wire |
Protecting Your Antique Prints After Installation
Your gallery wall is now complete. Protecting it ensures your prints survive for decades.
Keep humidity between 40-50%: too dry makes paper brittle, too damp encourages mould.
Dust gently. Use a soft brush or microfibre cloth every few months.
Rotate originals periodically if you have them.
Your antique print gallery wall is an investment in your home and in art history.
Frequently Asked Questions
How do I know if an antique print is authentic and not a reproduction?
Authentic antique prints show signs of age: foxing (brown spots from paper oxidation), hand-colouration inconsistencies, and original paper texture. Check the printing technique, copperplate engravings, lithographs, and woodcuts have distinctive tactile qualities. Examine the paper edge and back for period-appropriate materials. Reputable dealers like Antiquarian Print Shop provide provenance documentation, artist biography, and condition reports. Ask for high-resolution images of the print's back and edges before purchasing online.
What spacing should I use in a gallery wall spacing guide?
A standard gallery wall spacing guide recommends 5-8 centimetres between frames for a cohesive, professional look. Tighter spacing (5 cm) creates a bold, connected effect; wider spacing (8 cm) suits eclectic or minimalist compositions. Measure distances from frame edge to frame edge, not centre to centre. Use a spirit level and painter's tape to mark positions before hanging. For mixed frame sizes, maintain consistent spacing around smaller pieces and adjust spacing around larger focal prints to balance visual weight.
Can I mix different frame styles and finishes in one antique print gallery wall?
Yes. Mixing frame styles, wood, metal, painted finishes, creates visual interest and works especially well with eclectic antique prints. The key is choosing a unifying element: a shared colour palette (golds and blacks, pastels), consistent frame width, or a common finish (all matte, all glossy). Limit yourself to 2-3 dominant frame colours to avoid chaos. Varied frame sizes and orientations enhance the gallery effect as long as the overall composition feels intentional, not random. Test the arrangement on the floor first.
What should I do to preserve antique prints after hanging them?
Protect antique prints from direct sunlight, which fades colours and yellows paper over time; position your gallery wall away from south-facing windows or use UV-filtering glass. Maintain stable humidity (35-50%) to prevent foxing and paper warping. Avoid high-moisture areas like bathrooms. Use acid-free matting and conservation-grade framing materials to slow deterioration. Handle prints with clean, dry hands. Dust frames gently with a soft brush, never the print itself. For valuable originals, consider professional conservation framing to ensure long-term preservation.
Creating an antique print gallery wall transforms a blank wall into a curated collection that reflects your taste and values. The process requires patience, but each step builds toward a result you'll treasure. At Antiquarian Print Shop, we help collectors and design enthusiasts source authentic pieces and plan layouts that do justice to their prints. Shop original prints and begin your gallery wall today.