
How to Handle Antique Prints With Cotton Gloves
Last Updated: November 17, 2026
Quick Summary
To handle antique prints safely, wash and dry your hands first, then use clean cotton gloves for glossy or photographic surfaces or clean bare hands for sturdy matte paper. Support the sheet flat on a padded surface and lift it only by its edges, keeping it level throughout. Never lift a print by one corner, since the paper can tear or crease under its own weight.
- Wash and dry your hands thoroughly, even when wearing gloves.
- Use cotton gloves for photographs and glossy or heavily coated prints.
- Use clean, dry bare hands for sturdy, matte paper and edge-only handling.
- Support the sheet from underneath and lift it only by its edges.
- Return the print to its acid-free sleeve while it is still on the support.
Table of Contents
- Why Handling Antique Prints Needs a Careful Approach
- Cotton Gloves or Clean Bare Hands: A Decision Guide
- Choosing, Fitting and Preparing Cotton Gloves
- Step-by-Step: Handling an Antique Print
- How to Lift a Fragile Print Safely
- When a Print Is Brittle, Torn, Mounted or Oversized
- Archival Print Storage After Handling
- Booking a Viewing or Choosing Your Next Print
- Frequently Asked Questions
Why Handling Antique Prints Needs a Careful Approach
Antique prints are fragile paper objects, and every touch leaves a mark. Oils from skin, fine dirt and snagged fibres can all damage the printed surface over time. That is why careful handling matters more than most collectors expect.
Original prints from the past are prone to the same problems again and again. Most damage happens during everyday handling, not during display. A print that hangs safely on a wall can still be marked the first time it is lifted out of a folder.
Many collectors reach for cotton gloves first. Others say clean, dry hands work better. Both views have merit, and the right answer depends on the print and the task. This guide sets out a clear method you can follow.
Cotton Gloves or Clean Bare Hands: A Decision Guide
The glove debate is real, and it is worth understanding both sides before you start.
Cotton gloves can keep fingerprints and skin oils off sensitive surfaces. They are especially useful for photographs, prints with glossy or delicate finishes, and anything with a heavily printed image area.
However, cotton gloves also have drawbacks:
- They reduce dexterity, so it is harder to feel how a sheet is bending
- Loose fibres can snag on paper edges or transfer lint to the surface
- A glove can pick up dirt from one object and carry it to the next
Clean, dry bare hands are often the better choice for sturdy paper, for tasks that need a fine sense of touch, and for turning pages or lifting edges. Wash and dry your hands thoroughly first.
A simple rule works for most people:
- Use cotton gloves for photographs, glossy or heavily coated prints, and sensitive surfaces
- Use clean, dry bare hands for sturdy, matte paper and edge-only handling
- Hold the print by its edges either way, and keep your fingers away from the image
Choosing, Fitting and Preparing Cotton Gloves
If you choose gloves, pick a pair that fits snugly without pinching. Loose gloves slip and bunch, and tight ones tear. Lightweight, lint-free cotton is the usual choice.
Before you begin:
- Wash and dry your hands, even when wearing gloves
- Check the gloves for loose threads or holes
- Put them on just before you touch the print, not long before
- Remove any rings, bracelets or watches that could catch on paper
Work on a clean, flat, padded surface, such as a sheet of acid-free board on a table. Clear the area of food, drinks and loose objects first.
Step-by-Step: Handling an Antique Print
This is the print-specific workflow to follow each time you move an antique print from storage to a work surface and back. It assumes the print is unframed and in reasonable condition; the next section covers adaptations for brittle, torn, mounted or oversized sheets.
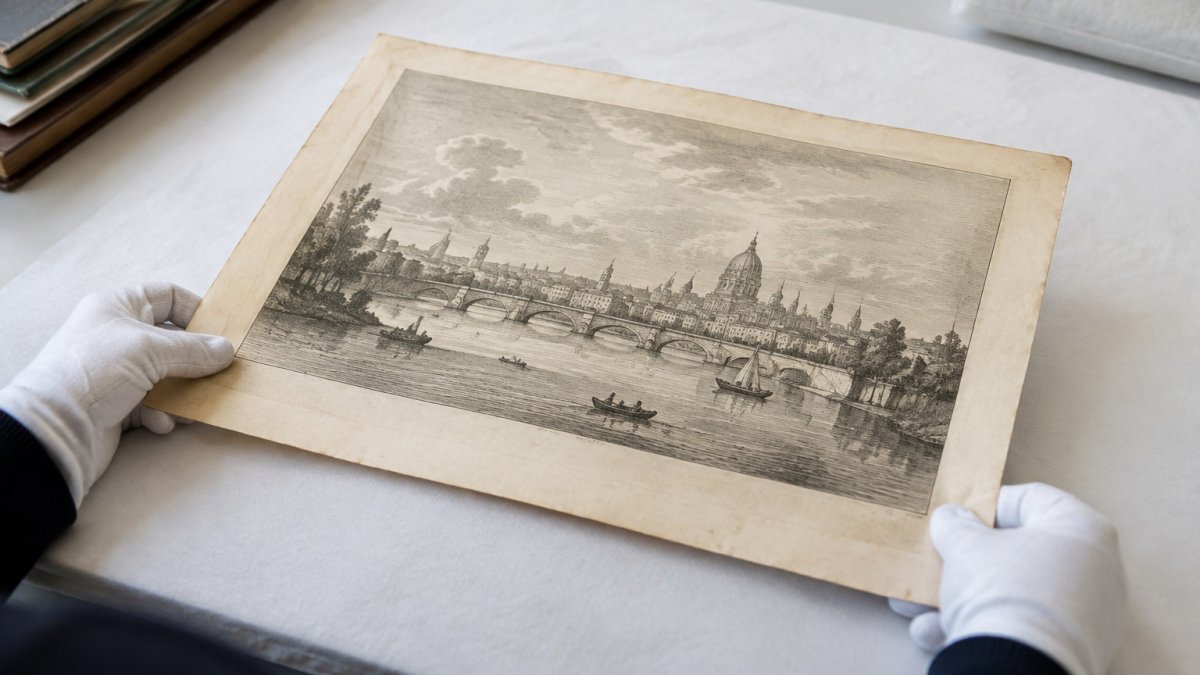
- Clear and prepare the surface. Choose a flat table large enough for the whole sheet plus a margin. Wipe it down, then lay a sheet of acid-free board or clean blotting paper as a padded support. Remove food, drinks, pens, keys and loose objects from the area, and keep pets and children away.
- Wash and dry your hands. Use soap and water, rinse well, and dry completely on a clean towel. Do this even if you intend to wear gloves, because gloves can transfer contamination from your hands to the outside of the glove.
- Decide on gloves or bare hands for this print. Use the decision guide above. As a working rule, glossy, heavily inked or photographic surfaces favour clean cotton gloves; sturdy matte paper and edge-only handling favour clean, dry bare hands.
- Inspect the gloves if you are wearing them. Turn each glove inside out and check the seams, fingertips and cuff for loose threads, holes, embedded grit or lint. A single loose thread can snag a paper edge. If in doubt, use a fresh pair.
- Open the storage enclosure on the support surface. Place the folder or sleeve flat on the board and open it there, so the print is never unsupported. Do not lift the print out of a folder held in mid-air.
- Support the sheet from underneath. Slide one hand, palm up, under the centre of the sheet, and place the other hand at the far edge to steady it. Spread the weight across both hands rather than pinching an edge.
- Lift by the edges only, and keep the sheet flat. Keep fingers clear of the printed image and any plate mark. Lift vertically a few centimetres, then move the sheet as a flat plane rather than tilting or curling it.
- Lower it gently onto the support. Set the near edge down first, then lower the rest of the sheet while keeping it flat. Do not drop the print or let it flex under its own weight.
- Work with the print flat. If you need to examine the image, do so with the print on the support. Do not hold it up to a window or turn it over in the air.
- Return it promptly. Slide the print back into its acid-free sleeve or folder while it is still on the support, then close the enclosure before lifting it. Store flat.
Watch out: the most common failure point is step 7. Lifting a sheet by one corner, or letting it bow while moving it, concentrates stress along a single line and is how creases and edge tears begin. If the sheet feels stiff or you hear paper crackle, stop and put it down on the support before continuing.
A second common pattern is contamination transfer between objects. If you handle several prints in one session, inspect or change gloves between items, and wash and dry bare hands between items if any print looks dusty or mould-affected.
How to Lift a Fragile Print Safely
Fragile prints need extra care. Use both hands and keep the sheet supported at all times. Never lift a print by one corner, because the paper can tear or crease under its own weight.
For larger sheets, ask a second person to help. One person supports the sheet while the other guides it. Move slowly and stop if you feel any resistance.
Lift from a flat surface where possible, and avoid sliding the print across a table. Friction can scratch the paper or pull fibres loose.
When a Print Is Brittle, Torn, Mounted or Oversized
Most handling guides stop at 'be careful'. The situations below are where careful handling actually changes, and where the wrong move causes damage that cannot be undone. When a print’s condition calls for stopping, leave it supported and avoid transferring the same risks to nearby volumes, since careful handling matters just as much when preserving antique books at Greatest Hits Music & Books.
Brittle or embrittled paper. Old paper that has lost moisture, been stored in heat, or been exposed to acidic mount board will crack rather than flex. Test gently: with the print flat on its support, see whether a corner lifts slightly under its own weight without resistance. If the sheet feels stiff, sounds crisp when moved, or shows existing cracks along the edges, do not lift it unsupported.
Torn or detached edges. Do not pull a tear open to see how far it runs, and do not attempt to rejoin it with tape, glue or household adhesive. Keep detached fragments in a separate acid-free envelope labelled to the print, and store the print flat so the tear is not flexed.
Mounted or adhered prints. Before moving a mounted print, check how it is attached: hinges, dry-mount adhesive, glue, tape or a backing board. Do not peel, pry or slide a blade under old mounting material, because the top layer of paper usually comes away with it. Move the whole mount as one rigid unit, supporting it from underneath.
Oversized sheets. Large prints behave like sails: a small movement at one edge produces a large flex across the sheet. Use a support board at least as large as the print, work with two people, and agree in advance who lifts and who guides. One person supports the centre from below while the other steadies the far edge. Never carry an oversized print vertically by the top edge.
Stop-and-seek-help thresholds. Put the print down on its support and consult a paper conservator if any of the following apply: the sheet is actively cracking or flaking; the image layer is lifting, blistering or powdery; there is mould, active insect damage or a strong musty smell; the print is adhered to glass or to another surface; or the damage is worsening each time the print is moved.
If something goes wrong. If you leave a fingerprint on a glossy surface, do not rub it. Set the print down and seek conservation advice, because rubbing drives oils into the paper. To learn whether a torn print can be restored and how collectors approach it, see antique print restoration tips for collectors.
Archival Print Storage After Handling
Once you have finished, store the print properly. Place it in an acid-free archival sleeve, then lay it flat in a folder or box. Keep the storage area cool, dry and away from direct sunlight.
Avoid storing prints in damp basements, attics or near heating and sunny windows. These conditions speed up yellowing, fading and mould. Check stored prints from time to time for signs of damage.
Booking a Viewing or Choosing Your Next Print
If you are ready to see antique prints in person or find your next piece, visit the Antiquarian Print Shop website to browse our collection. Our range includes authentic original prints and high-quality reproductions, and custom print options are available in multiple sizing formats. Pricing depends on the print, its condition and the size you need, so check the website for current prices or contact us for a quote.
Antiquarian Print Shop lists our collections and how to buy. If you have a print in hand and need a custom frame or mount, see custom sizing options for original antique art for guidance before you commit.
Frequently Asked Questions
Should you wear cotton gloves when handling antique prints?
Not always. Cotton gloves protect sensitive surfaces from skin oils and fingerprints, but they reduce dexterity, can snag fragile paper and may shed lint. For sturdy prints with a clean, dry pair of hands, washed bare hands often give better control. Gloves are most useful for photographs, glossy finishes, hand-coloured areas and any print where the image surface will be touched. Choose based on the print's condition and what you need to do with it.
What is the safest way to lift an antique print?
Lift a print by its edges with both hands, keeping your fingers away from the image area. Support the whole sheet on a rigid, clean board or tray rather than lifting from one corner, because the paper can bend or tear under its own weight. Move slowly, keep the print flat where possible and avoid carrying it by a single edge. If the print is fragile or oversized, ask for a second pair of hands before moving it.
Can cotton gloves damage old paper?
They can. Loose threads can snag brittle edges, and worn or dirty gloves can transfer dirt and lint onto the print. Gloves also make it harder to feel when you are gripping too tightly, which increases the risk of creasing or tearing. Use clean, well-fitting gloves, replace them when they become soiled and keep your grip light and deliberate.
How should you store an antique print after handling it?
Return the print to acid-free archival sleeves or folders and store it flat in a stable environment away from direct sunlight, damp and temperature swings. Avoid basements and attics where humidity can rise. Place the print on a clean, rigid board for transport, and keep it in archival storage that protects the image from dust, light and contact with other materials.